Utilisez le protocole MQTT pour transférer des données vers AWS IoT.#
Enregistrez votre appareil sur la page AWS IoT pour obtenir le certificat client et la clé privée.#
Cliquez sur Objets pour entrer dans la page.
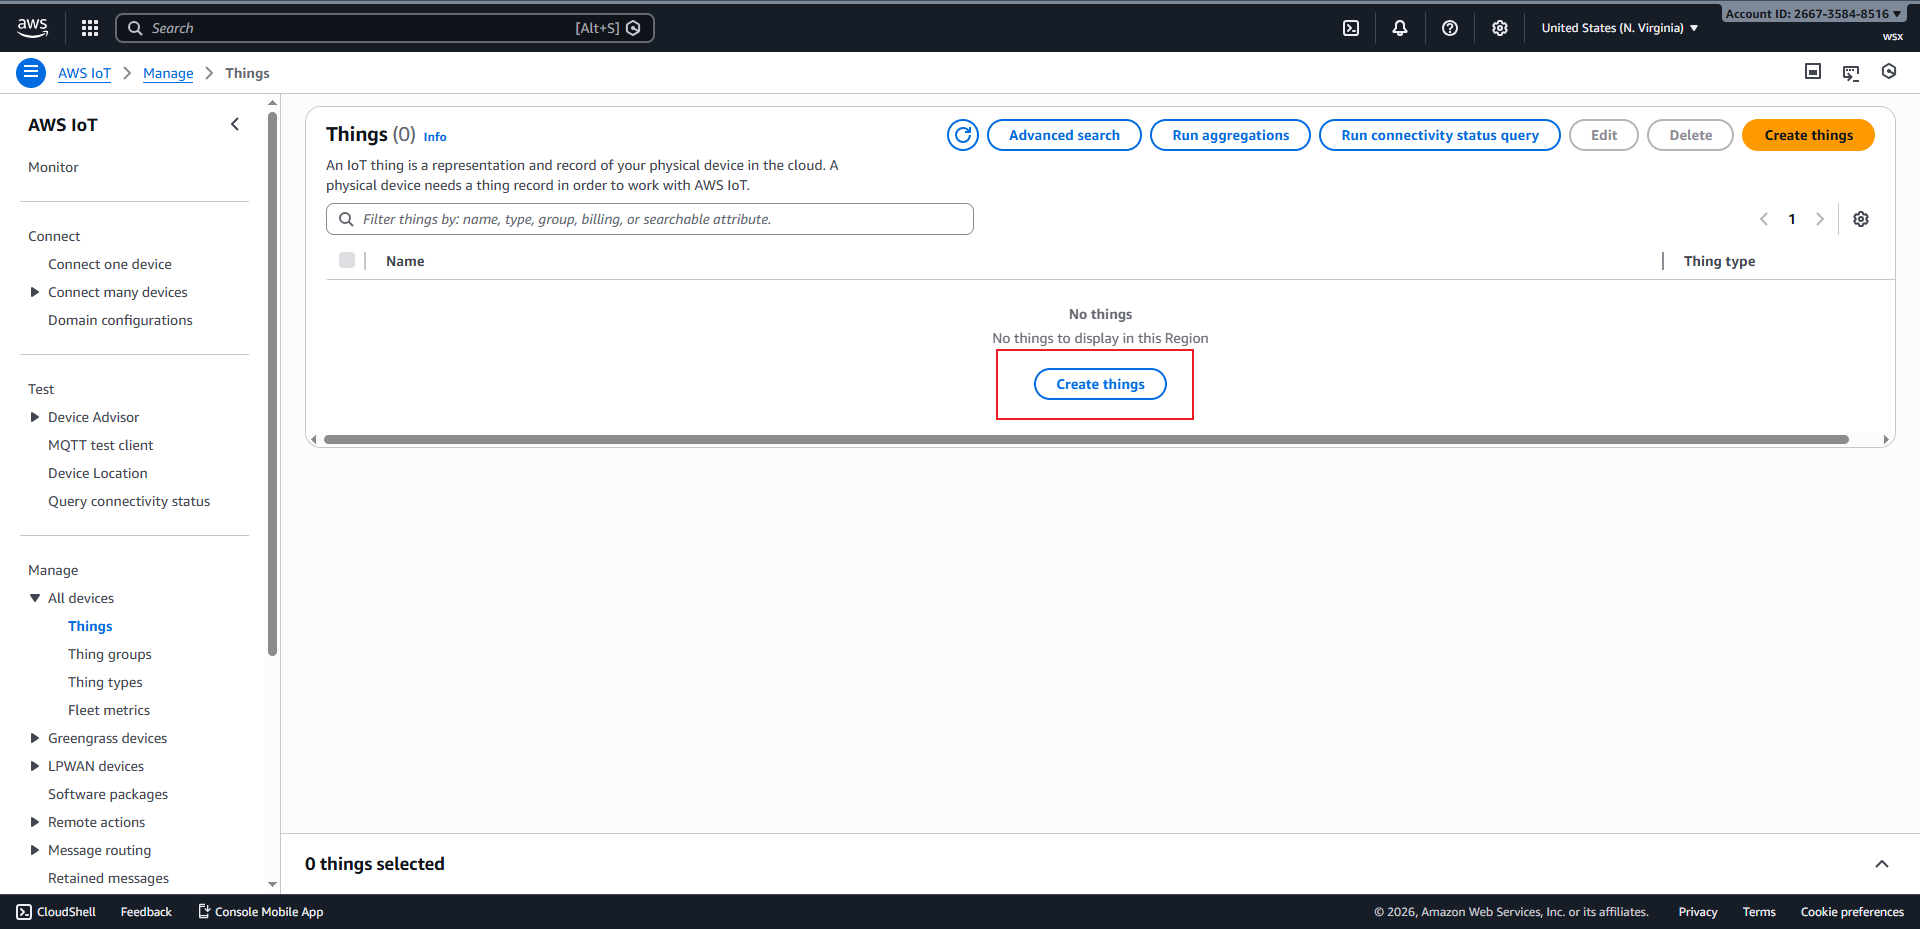
Cliquez sur « Créer des objets » pour accéder à la page de création.
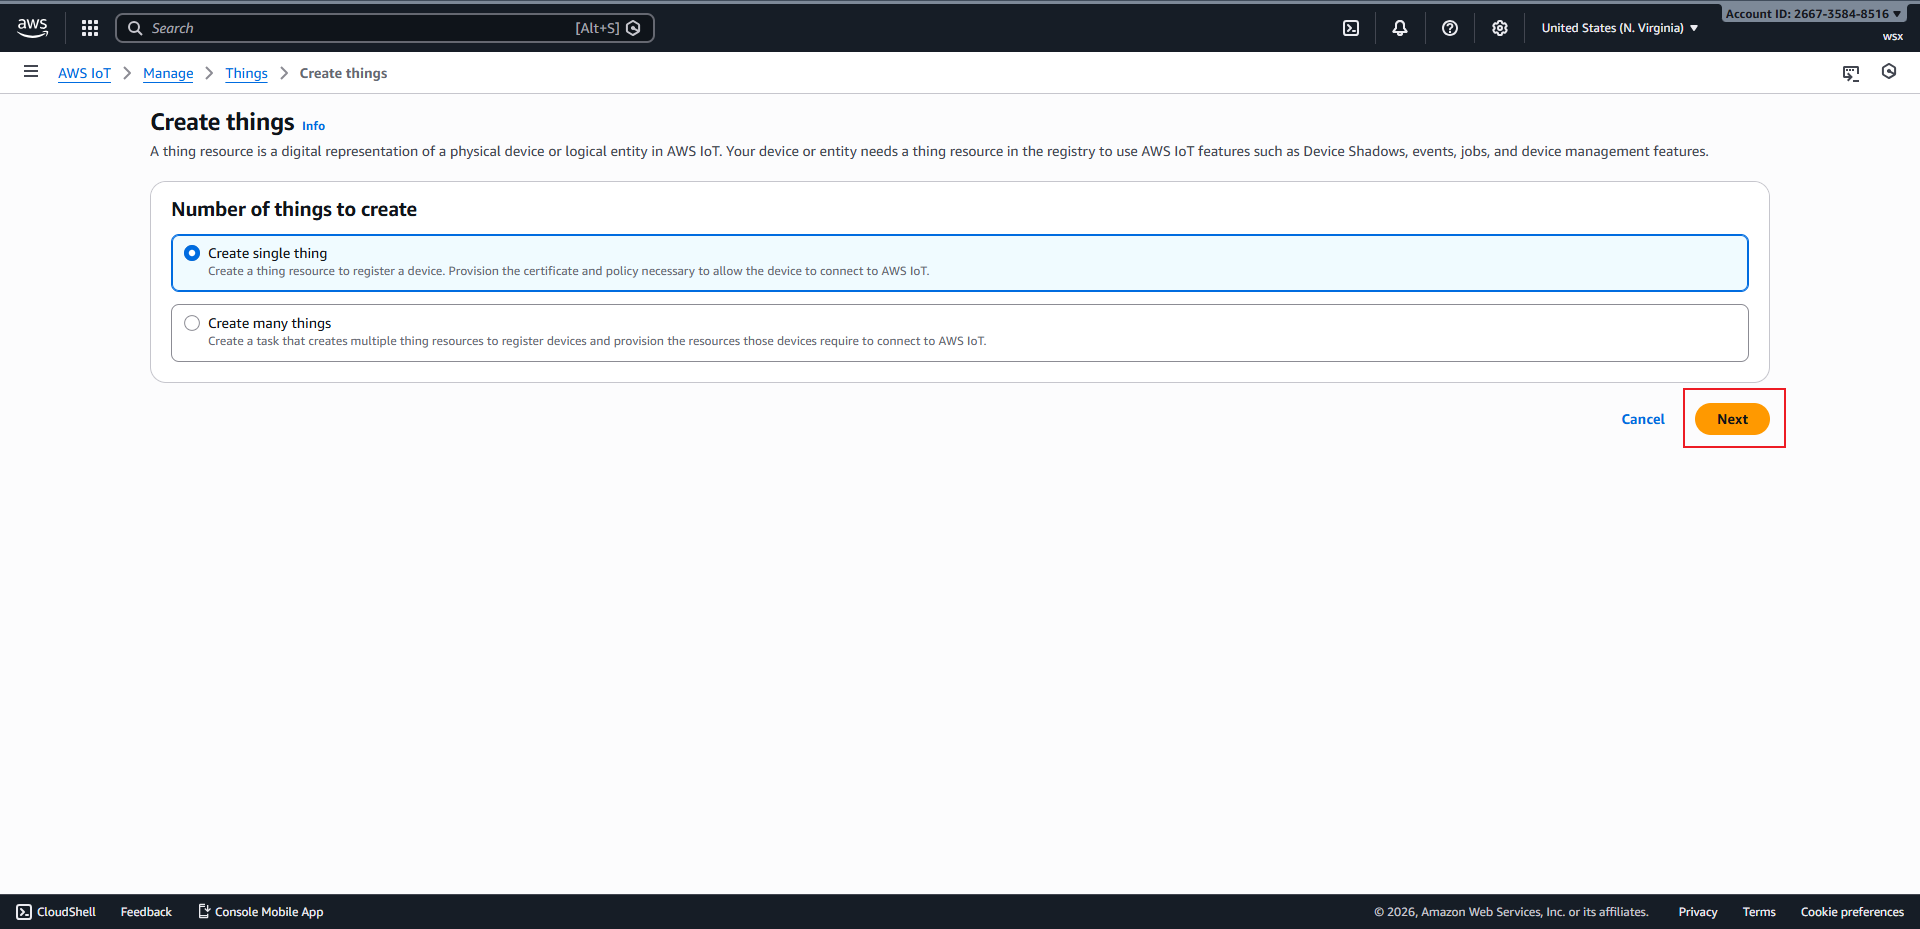
Cliquez sur « Suivant » pour accéder à la section « Spécifier les propriétés ».
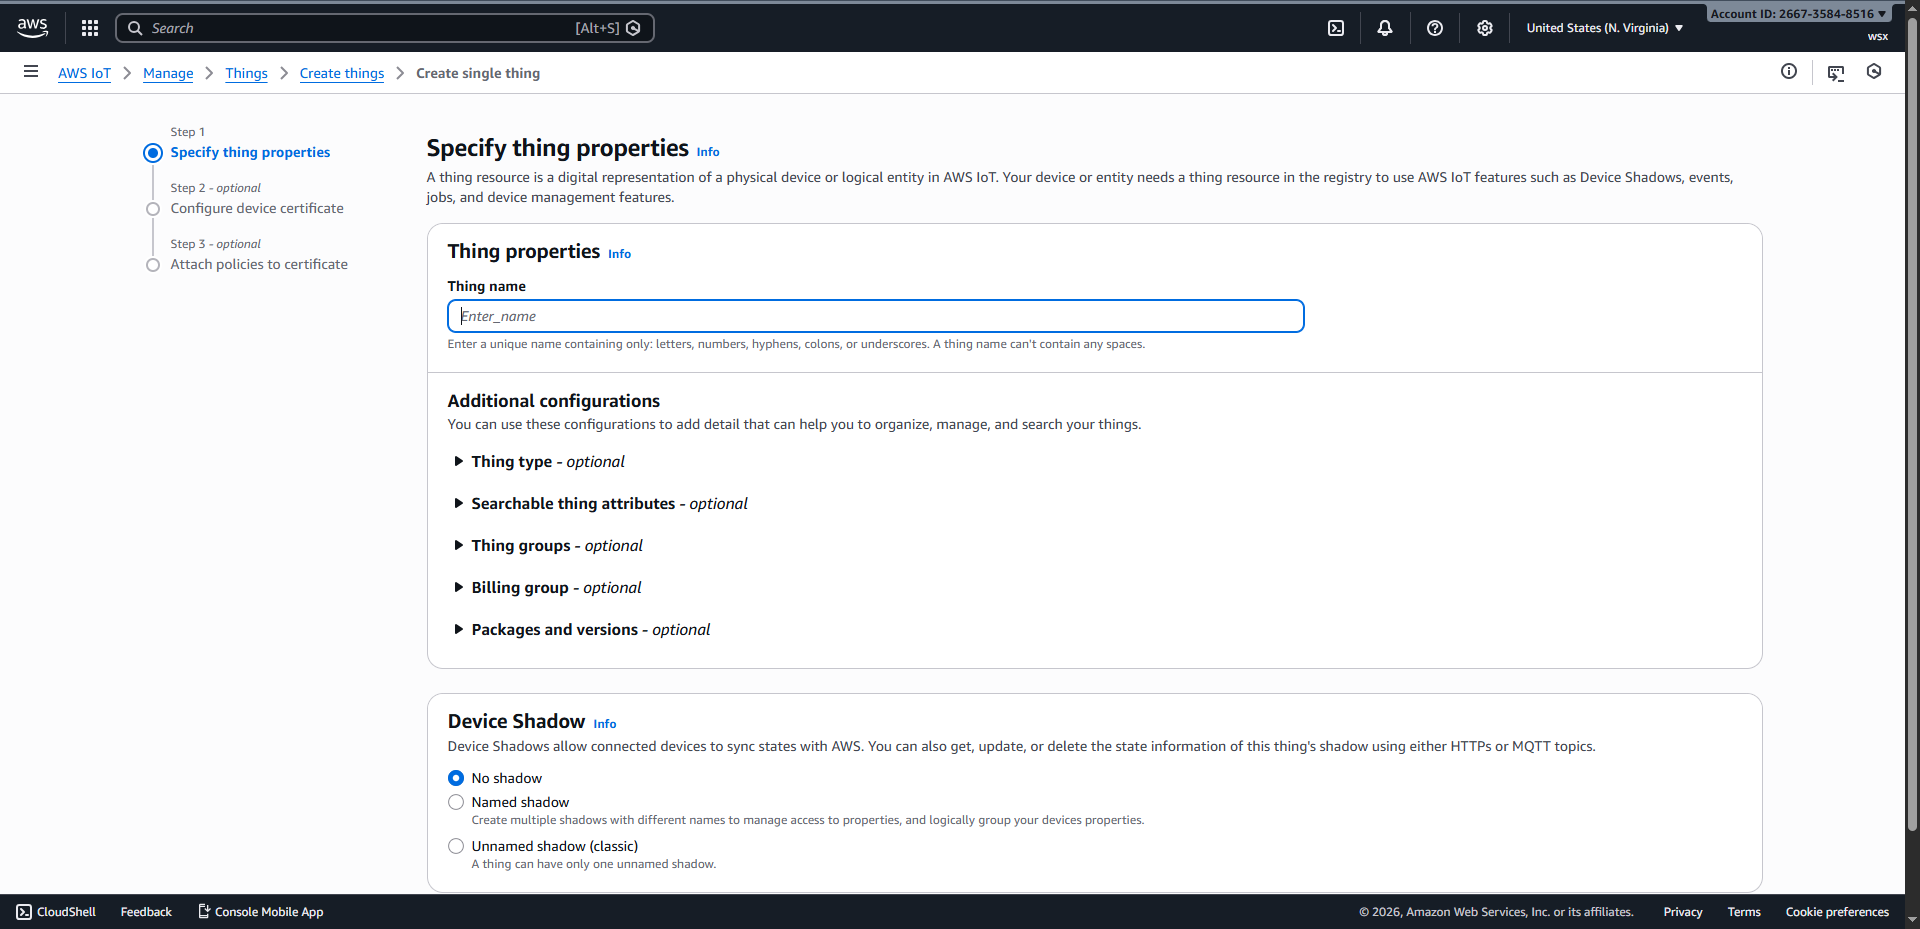
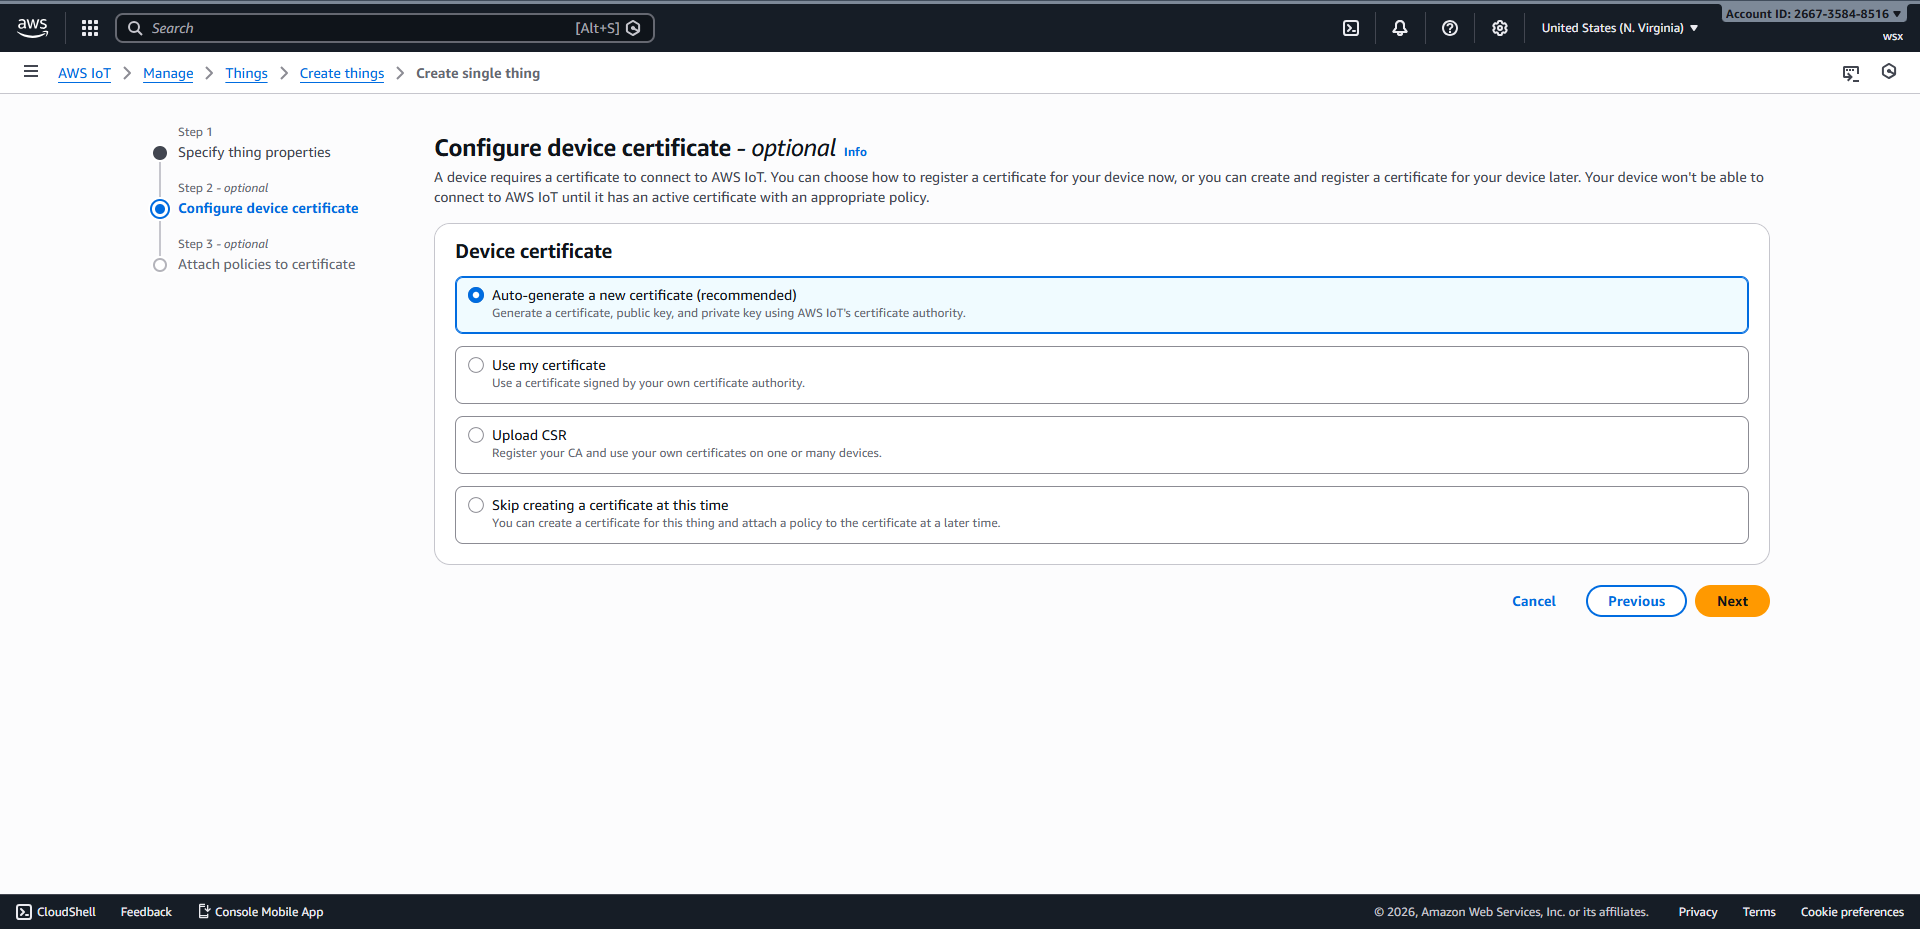
Après avoir saisi le nom de l’objet, cliquez sur « Suivant » pour passer à la configuration du certificat de l’appareil.
Cliquez sur « Suivant » pour accéder à la section « Associer des stratégies au certificat ».

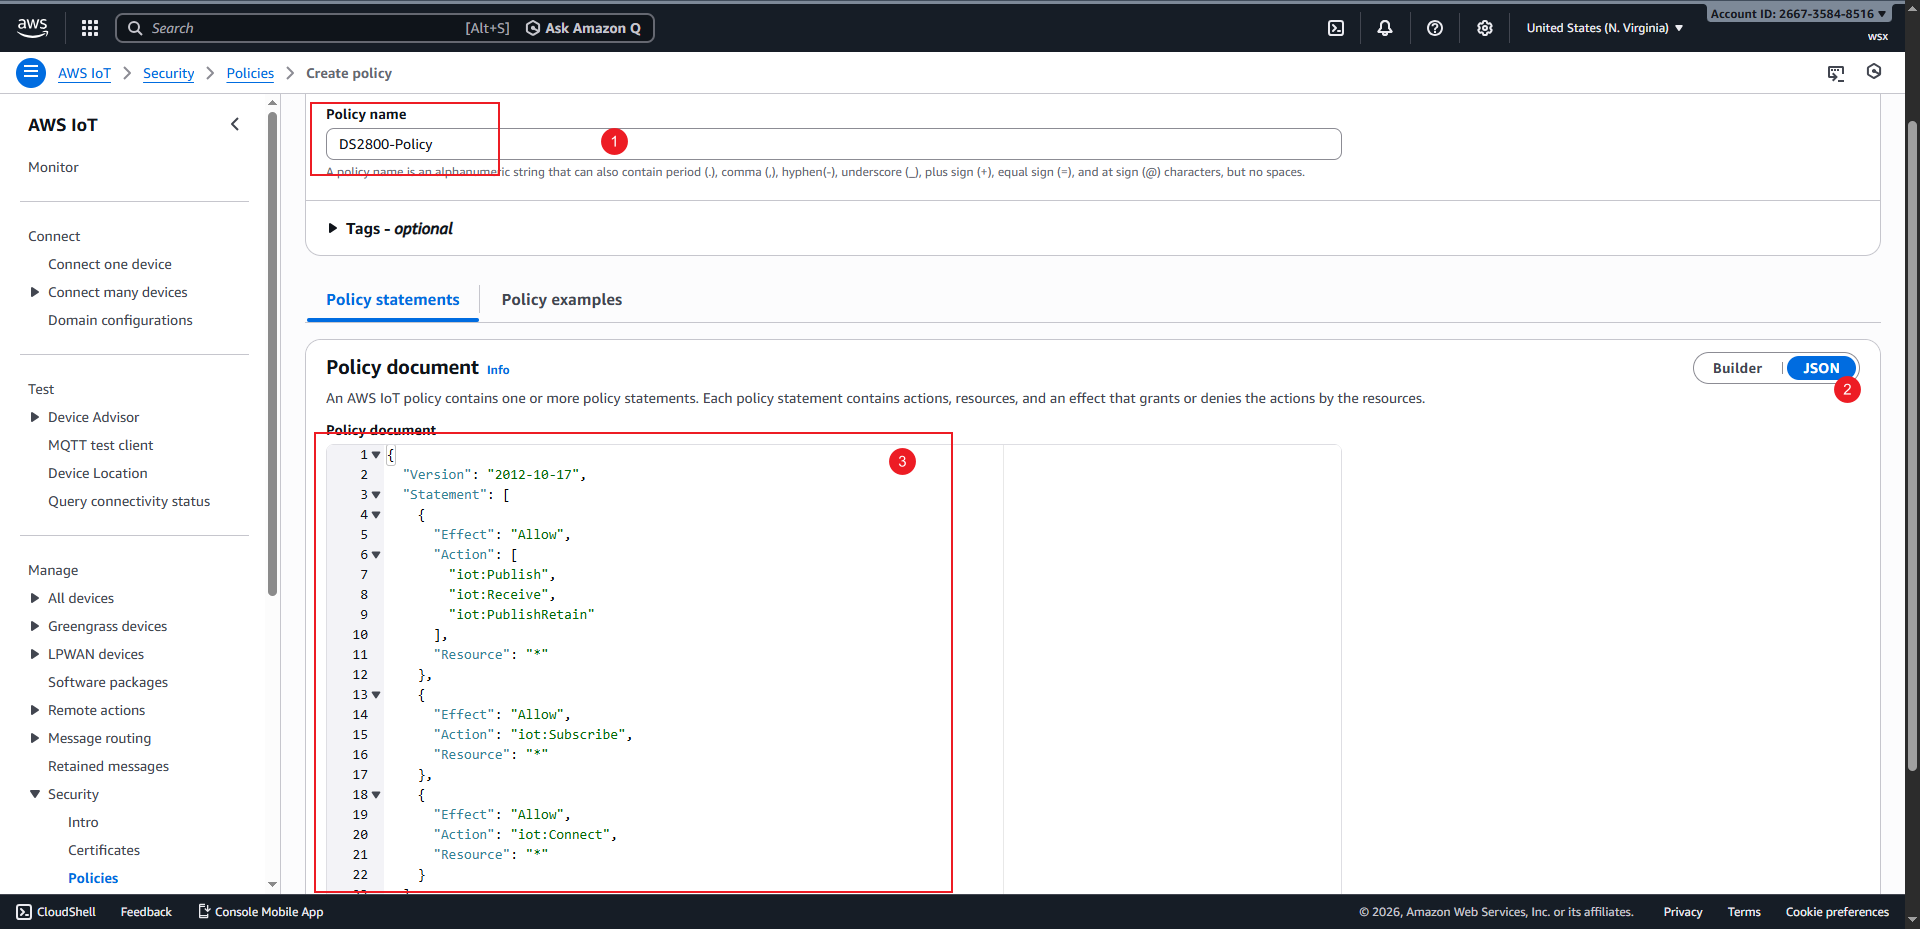
Cliquez sur « Créer une politique » pour accéder à la page de création de politique, saisissez un nom de politique, copiez le contenu ci-dessous dans la zone de saisie JSON, puis cliquez sur « Créer » pour terminer la création.
 1{
 2  "Version": "2012-10-17",
 3  "Statement": [
 4    {
 5      "Effect": "Allow",
 6      "Action": [
 7        "iot:Publish",
 8        "iot:Receive",
 9        "iot:PublishRetain"
10      ],
11      "Resource": "*"
12    },
13    {
14      "Effect": "Allow",
15      "Action": "iot:Subscribe",
16      "Resource": "*"
17    },
18    {
19      "Effect": "Allow",
20      "Action": "iot:Connect",
21      "Resource": "*"
22    }
23  ]
24}
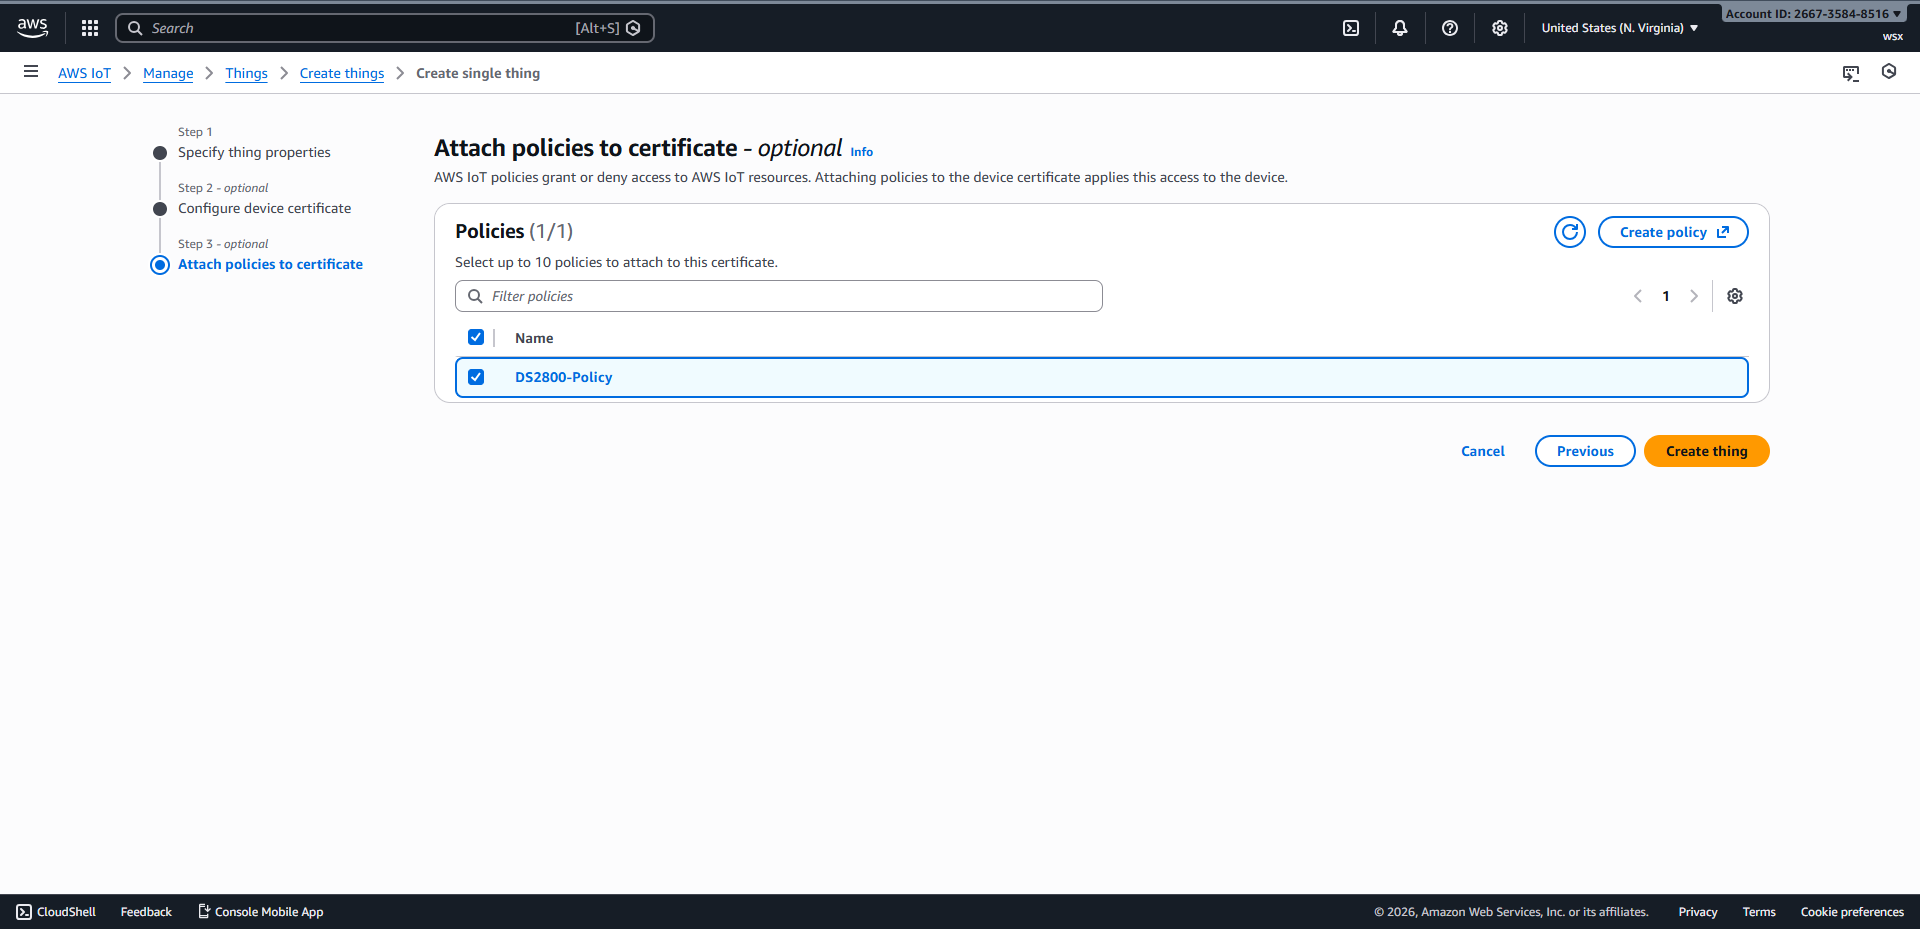
Retournez à la page « Associer des politiques au certificat », cochez la case correspondant à la politique que vous avez créée, puis cliquez sur « Créer des éléments » pour terminer le processus de création.
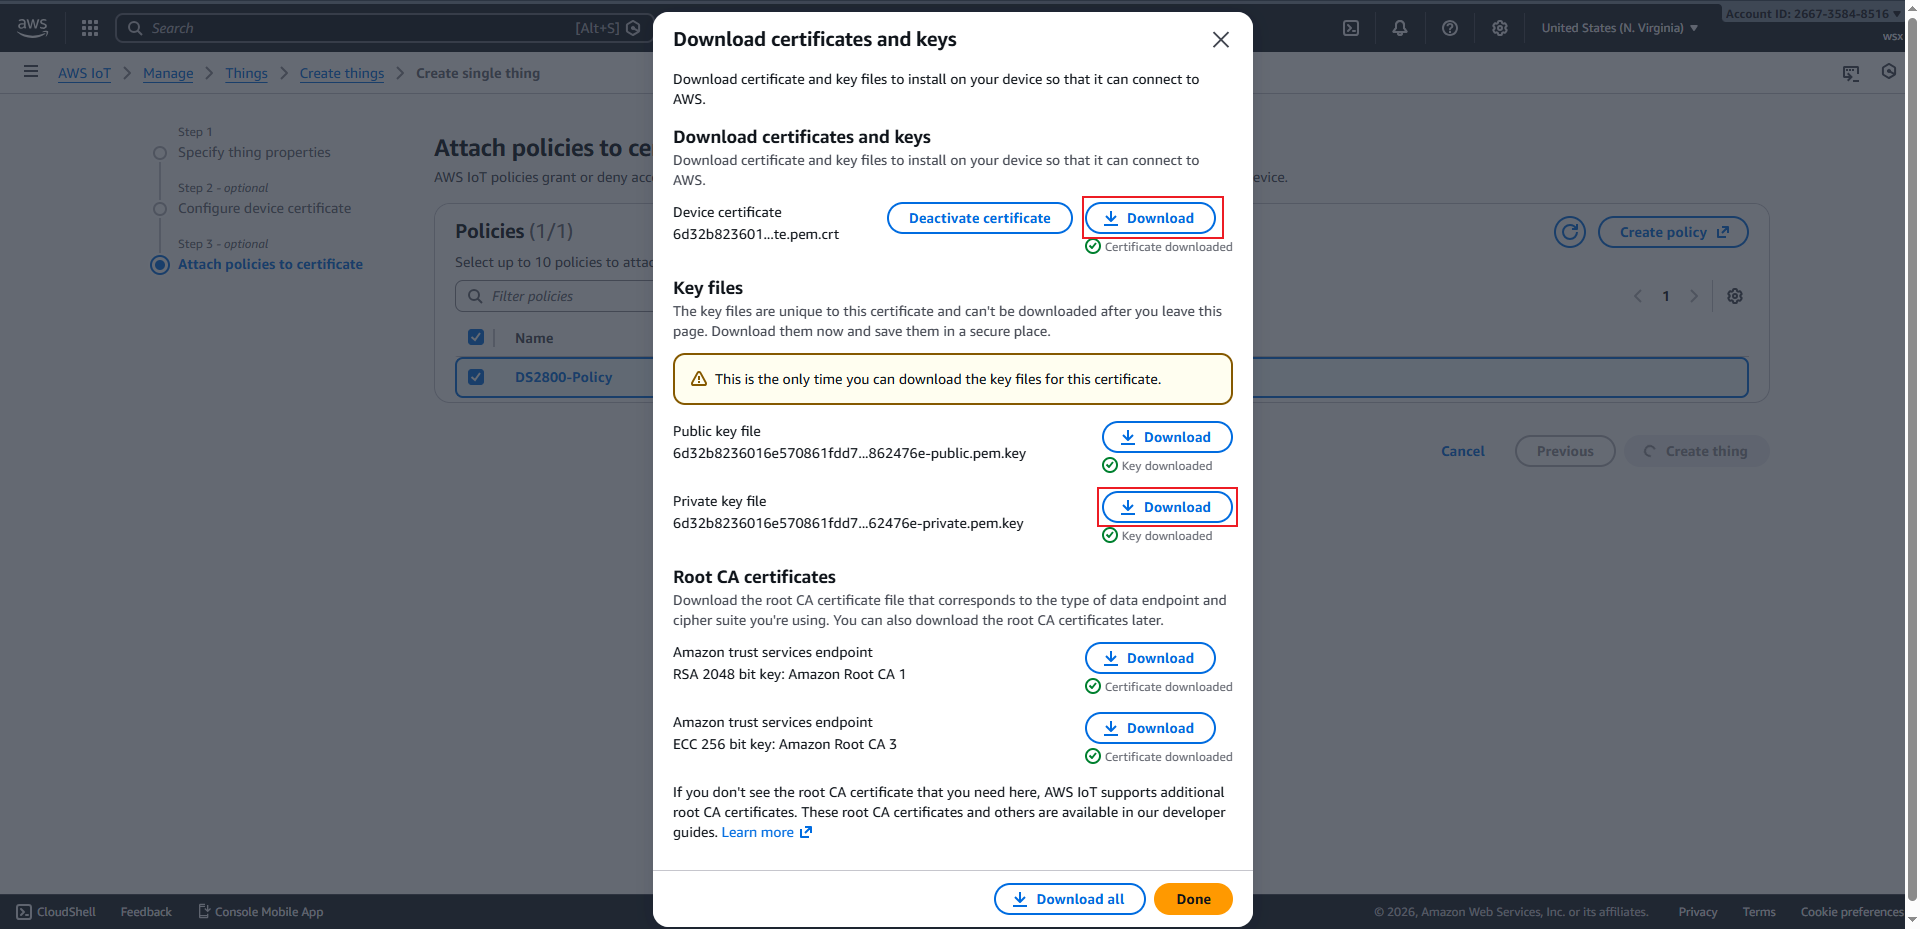
Commencez par télécharger le certificat et la clé privée, puis cliquez sur « Terminé » pour achever le processus de création d’objets.
Configurer le scanner#
Définir le mode MQTT#
Configurer le port MQTT sur 8883#
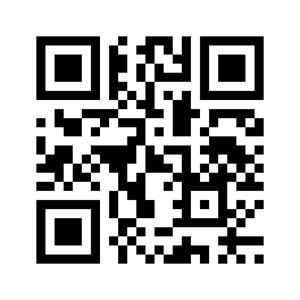
Définir le certificat client#
Astuce
Si le code QR est trop grand, nous vous recommandons d’en faire une capture d’écran et de l’envoyer sur votre téléphone. Ensuite, réglez la luminosité de votre écran au maximum avant de le scanner avec un lecteur de codes-barres.
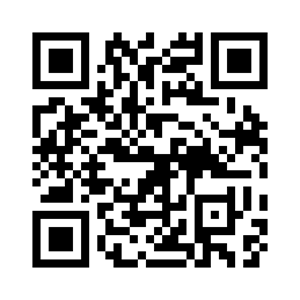
Définir la clé privée#
Astuce
Si le code QR est trop grand, nous vous recommandons d’en faire une capture d’écran et de l’envoyer sur votre téléphone. Ensuite, réglez la luminosité de votre écran au maximum avant de le scanner avec un lecteur de codes-barres.
Configurer le Wi-Fi et le courtier#
Astuce
Après avoir saisi les informations Wi-Fi et l’adresse du service, le scanner se connectera automatiquement à AWS IoT. Une fois la connexion établie, le voyant vert du scanner restera allumé.
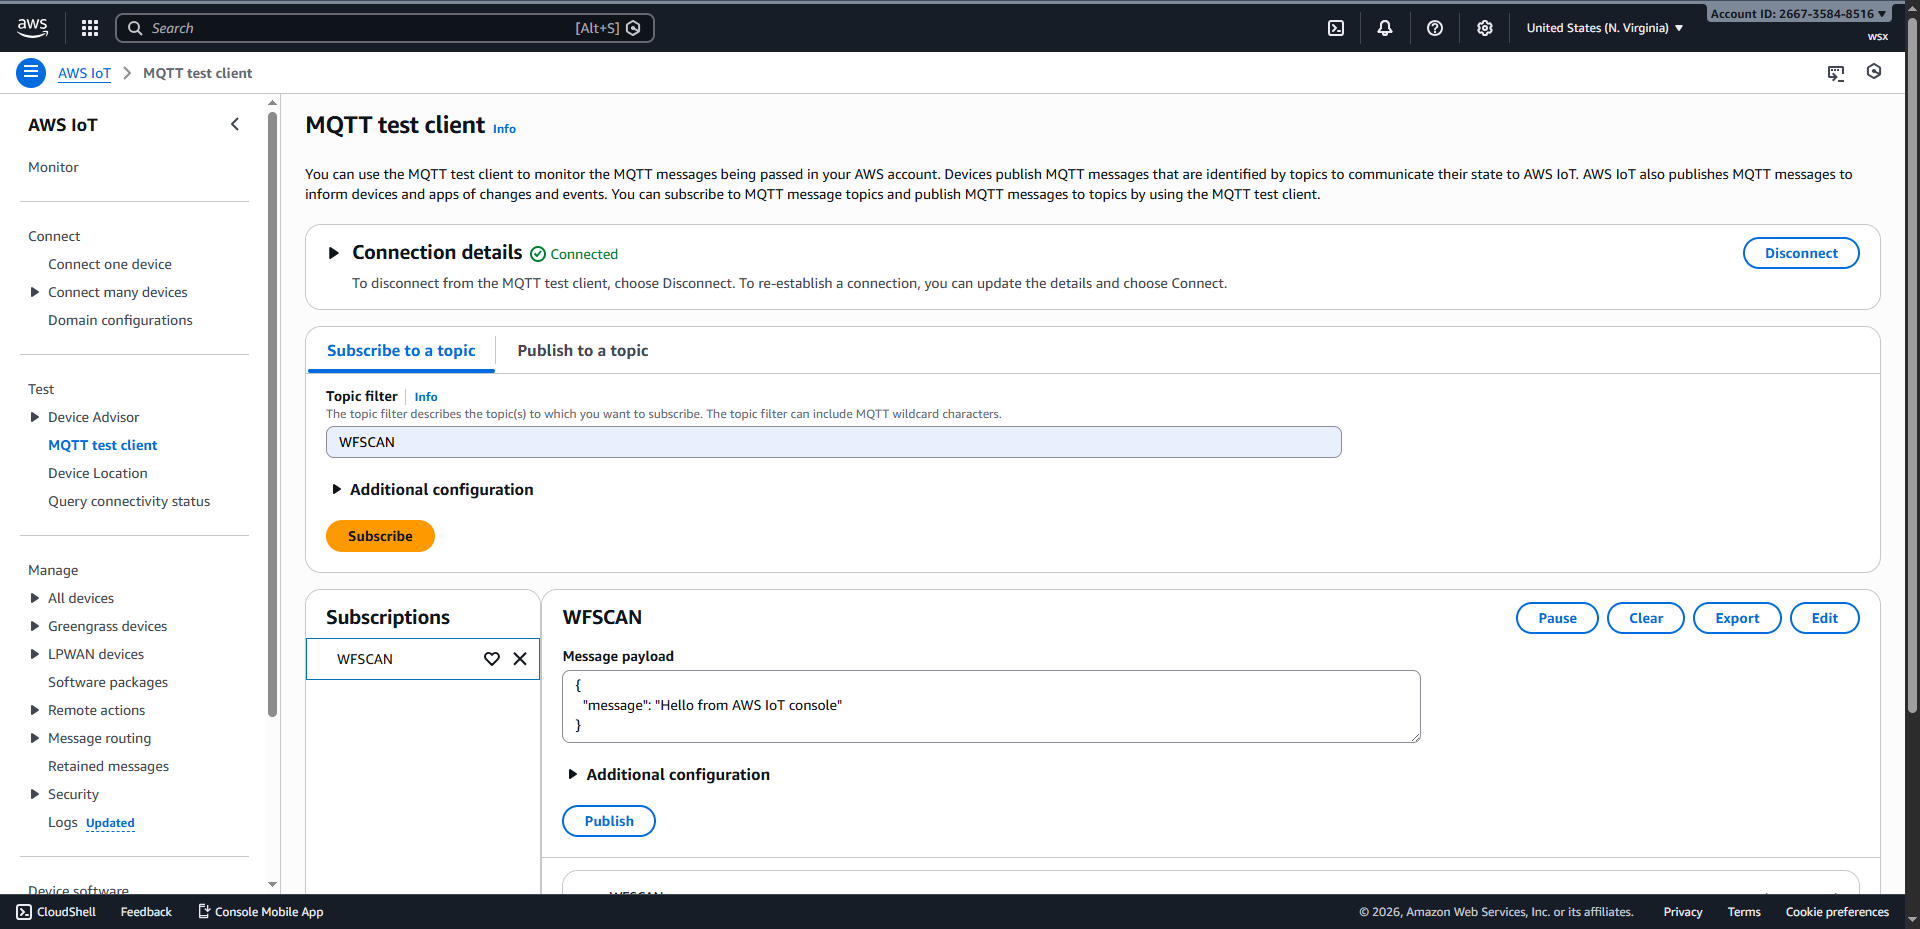
Client de test MQTT#
Cliquez sur client de test MQTT pour accéder à la page.
Après avoir saisi le sujet auquel vous souhaitez vous abonner et cliqué sur « S’abonner », utilisez le lecteur de codes-barres pour scanner le code-barres et recevoir les données du lecteur.